Jaguar Sovereign rust and restoration - lots of welding!

Moderators:robv12, xj40_register, Popsjag

db40

Member
Posts:74
Joined:Thu Sep 20, 2007 6:03 pm
Re: Jaguar Sovereign rust and restoration - lots of welding!

Postby db40 » Wed May 30, 2012 3:12 pm

Does the plenum chamber have drain holes to prevent water and condensate collecting there, leading to the rust? If so, where are they please? If not, is it possible to create some?

The plenum chamber has a drain fitted to the bottom of the plastic windscreen wiper mechanism housing. This has a tapered rubber fitting designed to allow water out, but to prevent smells and gasses from entering the plenum from the engine compartment. it is often referred to as the 'Duckbill', because it is somewhat like them in shape.

It is a very odd contraption which can become blocked and should be squeezed now and then to clear it - I believe it was even in the service schedule for the XJ40!

It actually works quite well unless it is blocked - when this happens the plenum chamber fills with water, sometimes for a long period of time. This causes the bulkhead to rot out.

These days a lot of people remove the 'Duckbill'; mine still has one, but I'm told removing it doesn't fill the cabin with engine smells.
(XJ40) 1992 Jaguar Sovereign 3.2 (93MY)

db40

Member
Posts:74
Joined:Thu Sep 20, 2007 6:03 pm

Re: Jaguar Sovereign rust and restoration - lots of welding!

Postby db40 » Wed May 30, 2012 4:12 pm

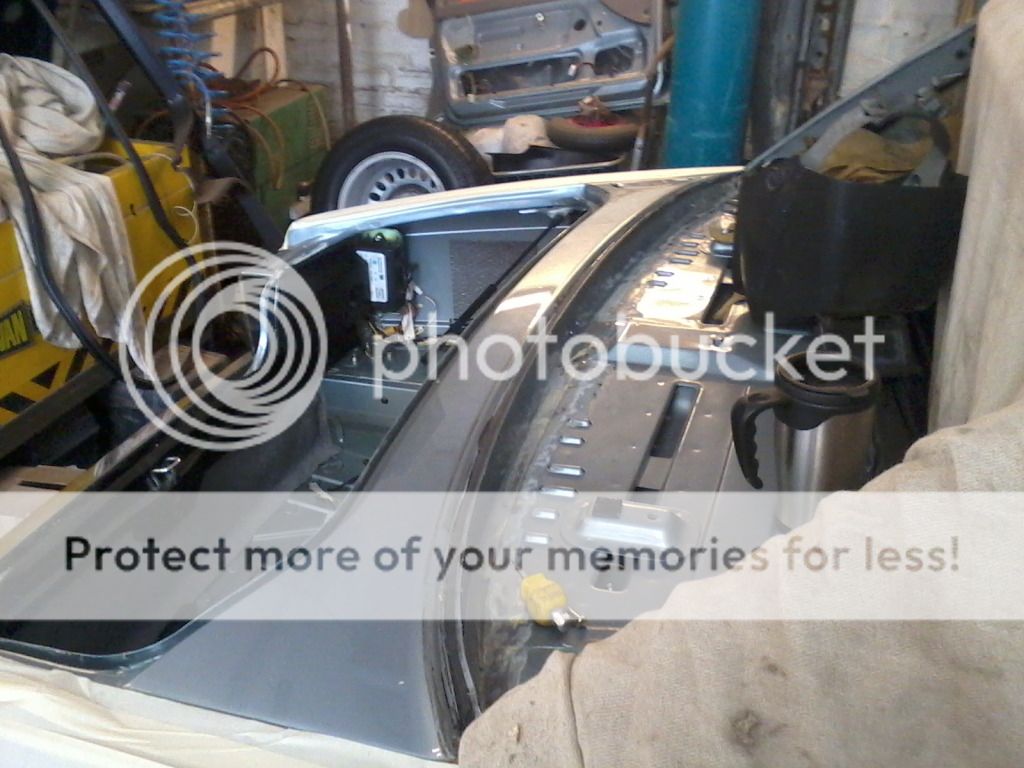
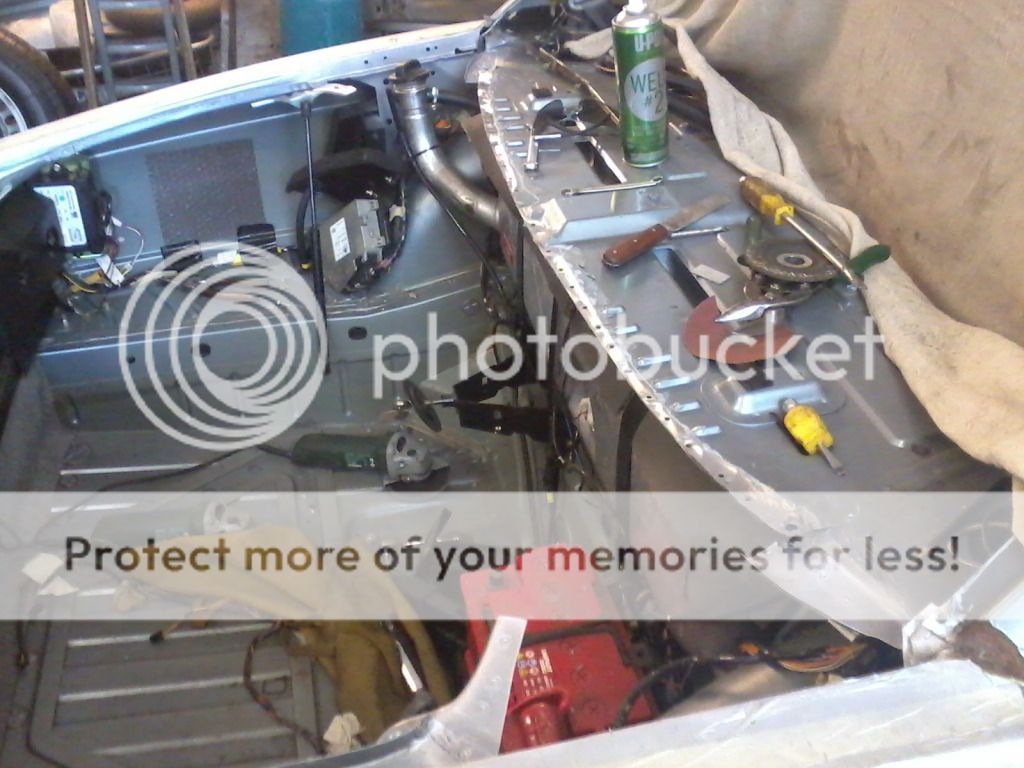
Again, the tasks are out of sequence. The rear deck panel was replaced after Gray had repaired the front driver's door pillar and sill. I'm missing a couple of photos of that, so I will post those areas of the restoration when I have them.


The rear deck panel on my car has dubious past, involving filler! Bodging doesn’t last and rust was festering. The paint on my car isn't oxidised and retains its lustre well, so any changes in pitch and texture on the body are very obvious. I saw it ripple slightly every single time I walked past the car whenever the sun was out - the reflection wasn't quite right and really made me shudder!

I managed to obtain a genuine Jaguar repair panel, part number CAP6314. The rear deck panel is a real heavyweight thing which made the plenum panel feel like it is made from biscuit tin lids.

Gray began by drilling out all the welds. Removing the rear deck panel is complicated by the XJ40's construction and the order in which the parts were originally assembled by Jaguar.
In particular, Jaguar welded the sides of the car on to the inner core as single units, something the company was very proud of at the time. This means the deck panel Gray needed to remove was welded in by Jaguar before the panels surrounding it, so lies beneath them. Removing the rear deck is a time consuming, painstaking process.

Removal starts:

Image

Gone! It wasn’t as easy as this! :D

Image

Image

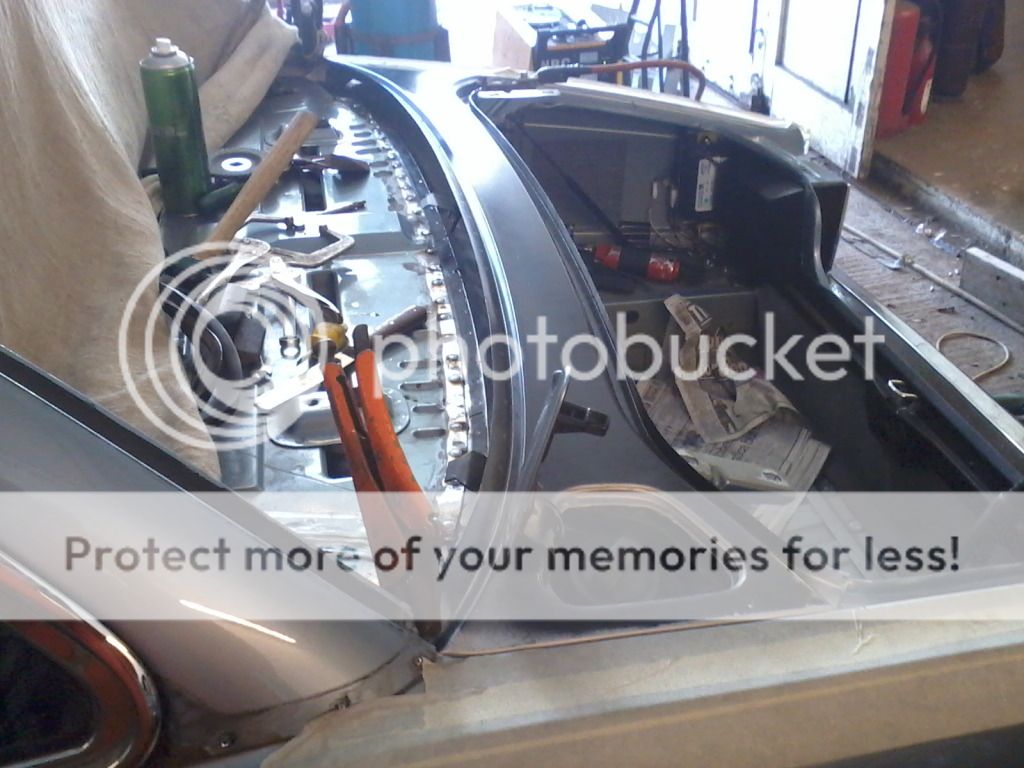
Fitting the new panel isn't any easier! It forms an important line on the car and must be perfect. Gray likes to get things completely 'just-so' and has achieved a perfect fit - it is identical to the original and a pleasure to see. I am relieved I won't have to suffer that 'glimpse' of filler in the sun anymore ...I tend to obsess about small imperfections! :oops:

New panel welded in, it is a perfect fit:

Image

Image

Image

The fuel filler flap assembly is not bolted in yet, thus sits low.

Image

It fits perfectly.

Image

Image
(XJ40) 1992 Jaguar Sovereign 3.2 (93MY)

db40

Member
Posts:74
Joined:Thu Sep 20, 2007 6:03 pm

Re: Jaguar Sovereign rust and restoration - lots of welding!

Postby db40 » Sun Jan 24, 2016 9:50 pm

It has been a long time since I last updated this - indeed the car was finished a couple of years ago. If I I don’t update this now, I never will! So, here goes!


The rear pillars under the stainless steel sixlights and rear pillar finishers were examined for rust. The rear pillar doesn’t look too bad at all…

Image

But after the trim has been removed…arghhhh!!

Image

I thought the other side was perfect – no rust showed at all, though there was a disconcerting slight brownness under the chrome if squinted at hard enough. Under the trim is a blooming hole!! :shock:

Image

Image

Starting to cut away…

Image


I took several pictures of the repairs to both sides, but could only find these two:

Image

Image

After the welders had finished, the car came back to the house – we needed to wait for a dry day, since it was a long way from watertight. I had wanted the car to go straight to the painter but he was running late.

Super lightweight special!! I did drive it a short distance like this, though obviously only on an industrial estate – not the road. It was a strange feeling; a mix of heightened speed and impending doom all at a very limited rate of travel!

Image

Image

They’re old cars now – but very complex and sophisticated for their day. It is amazing given the complexity that they are so reliable electrically:

Image
Last edited by db40 on Sun Jan 24, 2016 10:03 pm, edited 1 time in total.
(XJ40) 1992 Jaguar Sovereign 3.2 (93MY)

db40

Member
Posts:74
Joined:Thu Sep 20, 2007 6:03 pm

Re: Jaguar Sovereign rust and restoration - lots of welding!

Postby db40 » Sun Jan 24, 2016 9:52 pm

I had to wait a little while for the painter: he was running late and I was temped to find someone else. I would come to wish I had followed my instinct, since he proved a difficult man to deal with. It came as a real contrast to the welders – that stage had been a lot of fun. The paint stage was not so fun; I wasn’t particularly well and let things slide. Consequently it took ages.

These were taken the first time I visited:

Image

Image

Image

The following visit, the car had paint and was beginning to return to looking like my car again! I got used to seeing it in this dismantled state; A year before I would have panicked seeing the car so far from complete.

Image

Image

Image

Image

Image

Eventually, he finished the thing. I had intended to drive the car to an MOT station near to the painter’s workshop, have it MOT’d, then drive it home – thus saving the need to have the car transported. Alas, it wasn’t to be. The car had developed a water leak from the rear gasket of the metal water rail to the rear of the engine. It wouldn’t pass an MOT like that. Had I known, I would have built the car back up at home – rather than at the workshop. Oh well…

Image

The red 911 in the background is a 3 litre Carrera which had just undergone quite a bit of welding – very well done it was too. And yes, that is a Milkfloat.

Image

Well on the way now!

You can see from this photo how good the floor is of my car. It has had very little rust which was repaired in 2009.
Image

There are an incredible number of parts, nuts bolts and screws of various different sizes on an XJ40. The old beast makes its BL heritage known by the mix of Imperial, metric, and various other standards, mixed freely throughout the car.

I carefully sorted and catalogued each and every one of them, putting them all in the right order in a box together with the part they secure – it took me a whole evening. The painter then tipped the box on to the floor, mixing them all up and plunging me into a full-Rainman tribute performance!!


.
(XJ40) 1992 Jaguar Sovereign 3.2 (93MY)

db40

Member
Posts:74
Joined:Thu Sep 20, 2007 6:03 pm

Re: Jaguar Sovereign rust and restoration - lots of welding!

Postby db40 » Sun Jan 24, 2016 9:53 pm

Once back home, several things still needed to be done – the interior needed to be fitted – only the dash and driver’s seat had been put in; the windscreen wiper assembly needed to be fitted and the leaking water rail gasket needed to be replaced. The engine bay had become very dusty and also required cleaning to look its best.

I wasn’t going to take any chances with the bulkhead rusting again, so before the wiper went in, I liberally squirted Dinitrol all over the inside of the plenum. Loads of it.

Image


The dash looks fairly daunting, but is a clever design and goes back in very easily. The XJ40 was designed to come apart and reassemble very easily – and is a very easy car to work on. All plugs are colour coded and of differing size. Fixings are good quality – often metal and when they are plastic they are of good quality: few, if any fixings broke when I removed the dash or interior – indeed, I have a box full of new ones I purchased which I did not need.

I had intended to get a second hand driver’s seat to put in the car when it was in the body shop. I never actually got round to this and after the work had been completed it was very dirty. Thankfully though it was undamaged and the painter was careful not to allow any overspray.

It cleaned up well however – and suffered no deterioration as a result. The interior of the XJ40 is good quality and lasts the miles well. The steering wheel has an early airbag. It is no more attractive in real life!

Image

The lambswool rugs are missing from this photo – I must not have put them in yet when the picture was taken. I like them: they add to the slightly louche and disreputable feel and underscore how different these Jaguars are to most other cars.

Image

It is a bit dark, this photo – and the centre armrest isn’t quite sitting right. It took some adjusting!

Image

Camera just sneaking into shot!

Image

Grey leather – very much of the period.

Image

I had obviously put the fur rugs in by the time I took this shot.

Image

Boot complete with errant spanner.
(XJ40) 1992 Jaguar Sovereign 3.2 (93MY)

db40

Member
Posts:74
Joined:Thu Sep 20, 2007 6:03 pm

Re: Jaguar Sovereign rust and restoration - lots of welding!

Postby db40 » Sun Jan 24, 2016 9:55 pm

Returning the interior to the car was the first thing I did on the car’s arrival – storing it was taking up a lot of room. The coolant leak could wait – though it did mean the car was not MOT’d so could not be taken off SORN.


With the interior in, the car looked once again the way I remembered it.

Image

Image

Image

Image

Image

Image

These photos must have been taken after I had fixed the water leak, since the engine compartment is clean again:

Image

Image

The paint is pretty good, with a shiny consistent finish, accurate colour, the correct size of metallic flake (smaller and less noticeable than modern cars) and the clearcoat has great clarity. I am especially pleased that the colour retains the strange glow it takes on in certain lights. The painter used Glasurit paint and I am impressed with it.

It isn’t perfect. There is a very slight wave down the sides when viewed with movement from an oblique angle. Not the shimmering horror so often seen down the flanks of cars I see at car shows – which spoil otherwise lovely cars, but enough to irk me.

It is apparent when the sides are viewed from low down – crouching or kneeling – and looking backwards over the shoulder into light. Put like this, I am even sounding silly to myself and no one else seems to see it, it must be said. I am being pedantic and I didn’t pay enough for the paint to expect perfection. It looks smart: that should be enough!

Looking down the sides, reflections are clear, in focus and in the main, close to straight. A slight weave is revealed by the piece of skirting board which lives on the garage floor since it is so much smaller than any of the skirting board in the house!

Image

Image

Image

Image

Image

The right hand side is just the same, but difficult to photograph since the car was parked near to the garage wall:

Image

Image

I have since adjusted the right hand rear bumper side bracket so that it no longer splays out, but sits snug to the wing as it should. The slight turn out of the rubber part of the bumper I could do nothing with: it is a common XJ40 foible – possibly caused by the rubber shrinking slightly over time? It has been like this for many years.

Looking closer, I also noticed the front bumper didn’t quite fit – but splays out at the corner pieces. Solving this took an embarrassingly long period of head scratching bewilderment!

Image

Image

Image

Initially I assumed that the bumper was not sitting quite far back enough. The Bumper sides are adjusted in and out by a pin on the inside of the bumper sliding in a track set in the bumper mount, the track having a curved path. Moving the block forward or aft will bring in or splay out the bumper’s side piece. This is how the rear bumper sides are adjusted.

Image

Not so the front: the bumper brackets are set – there is no movement in them. I took the bumper off, discovering that the bumper cannot be mounted too far forward – it is held on by two enormous bolts: they only go in one way – and have to line up.

This set me to thinking: there was only one possibility left I could come up with – that the bumper brackets were on backwards because the left hand one had been put on the right wing and vice-versa. I had labelled everything to avoid this – and everything else that was tipped on the floor!

Success! I swapped the brackets over and re-attached the bumper. It fit!

From this:

Image

To this:

Image

Whilst I was scrambling around on the floor attempting to reattach the front spoiler, I heard a huge fluttering kafuffle to the back of the car. Two birds really sounded as if they were fighting – or one was trying to eat another. I levered myself round on the car and sprang up. At the same moment a wood pigeon flew terrified with all the speed it could muster into the garage – followed by a large brown bird of prey, possibly a buzzard, but so fast I cannot tell for sure.

Image

Death was swift. In a second, all that was left in the garage of the pigeon was its head and a handful of feathers. So I put on the front spoiler and marvelled at the straightness of my bumper.

Image
(XJ40) 1992 Jaguar Sovereign 3.2 (93MY)

db40

Member
Posts:74
Joined:Thu Sep 20, 2007 6:03 pm

Re: Jaguar Sovereign rust and restoration - lots of welding!

Postby db40 » Sun Jan 24, 2016 10:00 pm

None of this was solving the coolant leak!

The car has a history of loosing drops of coolant in the distant past – immeasurable in the grand scheme of things – never enough to cause a measurable drop in level, but enough to put an occasional drip on the garage floor after hot shutdown. This was a long time ago however; the coolant leak was sorted under warranty when the car was less than one year old. It would transpire that the dealer solved the leak by tightening the heater bypass valve (a vacuum operated valve which shuts off the water flow to the heater matrix when the A/C is switched to cool) – which attaches to the cylinder head on the left hand side, under the inlet manifold. In tightening the valve, the mechanic had turned it, partially fouling the inlet manifold from underneath – which would make its presence felt over twenty years later in the form of a nightmarish experience removing the inlet manifold!!

The drip had returned a little while before I had the bodywork done. Shining a strong torch down between the inlet manifold’s pipes, I could see evidence of dried coolant building round the upper bolt which attaches the water pipe which returns water into the side of the engine. This isn’t a common problem – but nor is it unknown. It tends to develop very slowly and does not lead to a catastrophic loss of coolant if it suddenly worsens. The rubber pipe which runs from the pipe to the water pump can do this however: it is invisible and swelling and deterioration can go unnoticed. Consequently it can fail – generally under load, with the loss of all the coolant very rapidly indeed. The Jaguar AJ6 engine is one of the strongest of any car: it will generally shrug off a loss of coolant in this way without damage. I know of several cars which have suffered in this way. None of them blew a head gasket or suffered other damage, despite more than one loss of coolant at speed in the fast lane of a motorway!

The leak worsened considerably in the time the car was at the painter. By the time he had finished it was enough to produce a pool under the car! It didn’t seem to phase him and he didn’t bother to tell me about it, which displeased me. He didn’t bother topping it up either – and it was somewhat low (though not seriously so) when I picked the car up. Tough as ever, there has been no damage done.

Image

With the inlet manifold and thermostat housing removed, the water pipe is visible along the side of the engine. The water rail had leaked for some time – there was a small but noticeable build up of dried coolant all around both the top and bottom bolts and I worried that the bolts would be corroded. I need not have worried though – all four of the bolts were clean, untarnished metal. The coolant has been replaced every couple of years since the car was new – the lack of corrosion is my reward for that.

At the rear of the engine you can see the heater shutoff valve. This had turned up when tightened clockwise which prevented the manifold from coming off. It was VERY difficult to remove in situ, but I had no choice!

Image

Together with the old one: I replaced it with a genuine Jaguar item – happily, in common with nearly all the other parts for the car, it was marked ‘Made in England’. I believe some of the aftermarket ones are made in Mexico.

Image

I took the opportunity to replace all of the hoses and the coolant. The hose behind the water pump is especially difficult to replace when the manifold is on.

Image

Making sure the new inlet manifold gasket fits – I bought it from Jaguar, but it is not the same as the original three part gasket with a plastic spacer. The new gasket is a one piece affair with the card parts glued to a central (plywood!!) spacer. I need not have worried: it works well.

Image

Now the thermostat housing is fitted to the front of the engine and the last two water pipes attached to it and to the engine itself. This leaves only the heated air breather and its two tiny pipes and the expansion tank to do after the inlet manifold is fitted.

Image

Now it was time to put back the inlet manifold. I was concerned by some slight scratching on the mating surface – possibly done when I was trying in vain to get the damn thing off! Indeed, I asked whether it needed to be re-skimmed on the ‘Jag-lovers’ forum. The general consensus was that it is fine – as it proved to be. I have not suffered any air leaks.

Image

Here it sits waiting for its moment in our (very messy) utility room.

And back on! – This was exceedingly easy now the water valve was on correctly.

Image

The oil filler tube was refitted along with the idle air valve and heated breather and I connected the fuel rail. Some of the breather pipes were a little swelled, so I replaced all of them. All the vacuum lines were a little hard, so they were replaced too.

Image

Connected and checked all the evaporative loss system on the inlet manifold’s underside:

Image

And fitted the air flow meter and air filter housing:

Image

Adjusted the throttle and transmission cable:

Image

And it was done!

Image

Image

Image

Image

I had already cleaned the engine compartment, which had become very dusty in the painter’s workshop. I did this before I removed the inlet manifold, since I like to work in a clean environment. There is less chance of me contaminating something important if it is all clean – and I can see what I’m doing!!

Image

I was also able to buy an NOS brake fluid warning label since the old one had become tatty. It must have had some brake fluid spilled on it many moons ago – so had dried out.

Under bonnet relays and the high pressure hydraulic accumulator and pump. Jaguar used this technology under license from Citroën.

Image

Image
(XJ40) 1992 Jaguar Sovereign 3.2 (93MY)

db40

Member
Posts:74
Joined:Thu Sep 20, 2007 6:03 pm

Re: Jaguar Sovereign rust and restoration - lots of welding!

Postby db40 » Sun Jan 24, 2016 10:01 pm

When my dad originally bought it, he had rubber side strips put on to protect the flanks from parking dents. These were made by Jaguar initially for the American market – and initially offered on the USA-only Majestic model in the late 1980s. Ironically, very few American XJ40s actually have them.

As the car was in the early/mid 1990s, with side strips in place:

Image

Image


When he first had them fitted, they were actually a fairly rare sight on XJ40s and were a dealer-fit option. They were much more commonly fitted to the very late XJ40s – they could be fitted in the factory on the last few cars. The side strips were expensive, so Jaguar may have had big stocks of them left when production came to an end with the launch of the X300 in 1994 – and maybe decided to ‘throw them in’ on late ‘40s, since the X300 came with a different, painted side strip as standard.

Image

Here they are as they appeared in a 1993 Daimler brochure – along with a super-modern mobile phone! Mine originally had a Jaguar-Panasonic carphone set into the centre console lid – as did most XJ40s with mobile telephony. I imagine the brochure’s alternative was a very expensive one! I note too, that by this time Jaguar were offering Daimler branded over-carpets; fur rugs were standard on the Daimler, but were perhaps a little flamboyantly rakish in a marketplace newly in thrall to sober German cars.

I took the side strips off in the mid 2000s – I don’t remember the exact date. The ‘chrome’ strip on them had clouded and started to peel. It was plastic – not chromed metal – or polished stainless and is most of the bright work on the XJ40, chrome plated bumpers and door handle aside. I always had mixed feelings about them. The chromed part is of significantly worse quality to the rather well made rubber part of the strip.

Some time later I saw this article on the internet, which details the refurbishment of the very similar side strips used as standard on face lifted Rover SD1s – in this case, a Rover Vitesse – amazingly using chrome theatrical tape!

http://www.vintagemodelairplane.com/pag ... Rub01.html

By coincidence, two regular posters on http://www.xj40.com had tried something very similar, also using the chrome tape from Flint Hire and supply.

I was a little circumspect, but seeing fellow xj40.com members achieving good results encouraged me to have a go too. Fortunately, when I took the side strips off I kept them – so I didn’t need to buy a new set.

Following the advice in the online blog article, I rubbed the chrome parts with fine sandpaper until all of the original chrome tape was gone – leaving just the grey underlying substrate:

Image

Image

The chrome tape with the side strip, with the chrome removed, ready for the tape to be applied to the grey substrate. Preparation is almost everything with this job!

Image

Image

The chrome tape is carefully applied across the substrate at the top. The result is remarkably effective – identical to the original:

Image


I marked the level for the top of the strip all the way down the side of the car with a narrow blue masking tape – and applied each of the strips to the car. The strips are held on with double sided tape. To aid adhesion, I warmed the side of the car with a fan heater. With the metal warm, the adhesive tape really ‘grabs’ well.

Image

When I was selecting these photos, I thought this one was part of the same series – but I now note the rhododendrons have suddenly burst into bloom – so obviously it’s not!

Image

And out of the garage it goes… I’m not sure everyone will like the side strips; I can never make up my mind whether I prefer the car with them or not. But they returned the car to the way it was – added authenticity, if you like.

Image

Image


And how the car is now. A year on, the chrome tape has not deteriorated.

Image

It is a silly little thing really, but I always like to see old cars still wearing their original dealer plates – as mine does, both on the front and on the back:

Image
(XJ40) 1992 Jaguar Sovereign 3.2 (93MY)

ptjs1

Member
Posts:3520
Joined:Thu Apr 27, 2006 7:14 pm
Location:Kent

Re: Jaguar Sovereign rust and restoration - lots of welding!

Postby ptjs1 » Sun Jan 24, 2016 10:23 pm

db40,

Great job, well done! The car looks great and I loved seeing all the pics. This would make a great article for the magazine.

I'm really impressed with how well you've done on cleaning the engine. As a matter of personal interest, what product did you use to clean the alloy block and head?

Cheers

Paul
1995 XJS 4.0 Convertible
1980 XJ-S Pre-HE
Jaguar 4.2 Supercharged engine (but not with a Jaguar body..)

User avatar
J44EAG

Moderator
Posts:6239
Joined:Sat Oct 20, 2007 9:57 pm
Location:Warlingham Surrey/Faversham Kent

Re: Jaguar Sovereign rust and restoration - lots of welding!

Postby J44EAG » Sun Jan 24, 2016 10:54 pm

Heck! That is a lot of work and very well executed. Most impressive.

Such a shame when the tin worm strikes. Multi-layer steel inter facial corrosion is the very Devil.

Very nice work. Keep at it.

Mike K
X350 Co-ordinator

2004 XJR

alec2824

Member
Posts:152
Joined:Mon Jun 23, 2008 3:34 pm

Re: Jaguar Sovereign rust and restoration - lots of welding!

Postby alec2824 » Thu Jan 28, 2016 5:34 pm

I love that chrome tape! I wonder if it is still available?

thomas45
Posts:85
Joined:Tue Aug 12, 2008 4:57 pm

Re: Jaguar Sovereign rust and restoration - lots of welding!

Postby thomas45 » Thu Jan 28, 2016 9:55 pm

Wow ! going through all that made me feel really into it. I could manage the chrome tape but when I first saw a hole in the sill of my then 92 XJ40 I just panicked and got rid of it That was in 2004. Well I have learned to try a bit harder since but then a lot of stuff depends on 'horses for courses' .
Nonetheless, an inspiring and motivating read !
Thomas45 :mrgreen: :D

naki
Posts:435
Joined:Thu Aug 30, 2012 12:28 pm
Location:Kirton, nr Boston, Lincs, UK.

Re: Jaguar Sovereign rust and restoration - lots of welding!

Postby naki » Tue Feb 02, 2016 4:43 pm

A proper job indeed. Incredible attention to detail, that would expect from you David.
cant wait to see the car!
91 4.0 XJ6 Manual
92 4.0 XJR Manual
93 3.2S-4.0S Man conv
93 4.0 Sov
93 6.0 XJ81 DD6
93 6.0 XJ81 XJ12
94 4.0 XJR
96 X306 4.0 XJR
96 X300 Daimler Six LWB
97 X300 Sport 4.0 Manual
00 LR Discovery 2 TD5 ES A
03 X350 4.2 XJR
BREAKING various X300/ XJ40/ X308

User avatar
J44EAG

Moderator
Posts:6239
Joined:Sat Oct 20, 2007 9:57 pm
Location:Warlingham Surrey/Faversham Kent

Re: Jaguar Sovereign rust and restoration - lots of welding!

Postby J44EAG » Tue Feb 02, 2016 7:40 pm

Staggeringly impressive. I doff me hat to you.

This restoration really should appear in the magazine.

Mike K
X350 Co-ordinator

2004 XJR

User avatar
jBlackwell

Site Admin
Posts:1055
Joined:Wed Apr 28, 2010 5:19 pm
Location:Cwmbran

Re: Jaguar Sovereign rust and restoration - lots of welding!

Postby jBlackwell » Wed Feb 03, 2016 10:48 am

Agree,
That is an article that needs show casing.

James
James

2008 XF 4.2 ltr SV8.
Planet X Pro Carbon.
Planet X EC-130.


Who is online

Users browsing this forum: No registered users and 2 guests