spark plug change after lumpy running problem
Posted: Wed Nov 18, 2015 9:40 pm
My wife's X has developed a lumpy running issue, and then the engine fault light came on , as i had a full work load and couldn't work on the car for several days, not even to plug it into the computer, i bought a set of genuine Jag Platinum plugs and the six inlet manifold oval seals , these are specific for the 2.1 V6 , and are different to the 2.5 and 3ltr V6
when i eventually had a day off work i plugged in the Jaguar SSD and a few faults were thrown at me, some for the lambda sensors, and one for the MAF , the good news was that there were not any for the on plug coils etc,
but as i had the parts, and didn't know the last time they were changed as the car has now reached 120k miles on a 54 plate car i felt it was prudent to change them
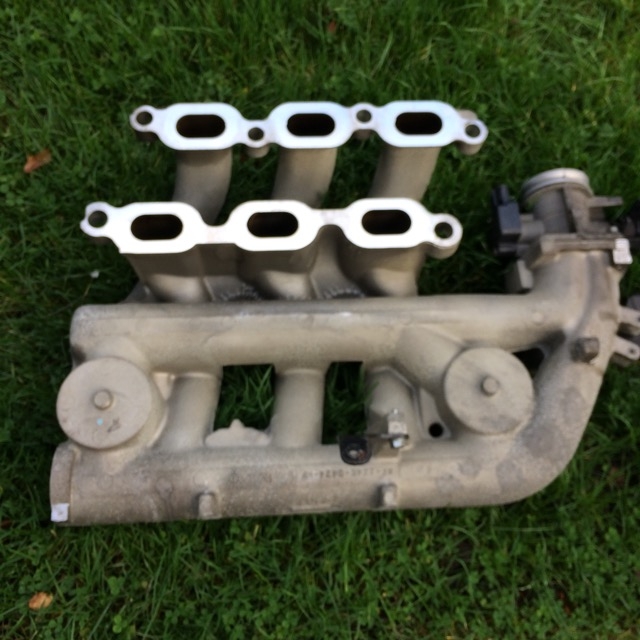
after some research , the inlet manifold seemed simple to remove, in practice, this was not however the case, yes the visible parts came away quite easily , however , non of the guides mentioned the two loom support brackets under the back , and the back upright support onto the back of the block against the bulkhead, and then a tight ( very tight ) wiggle to remove the intake manifold, here she is removed from the car , mating face already cleaned
IMG_3161 by MyPix on Talk Photography
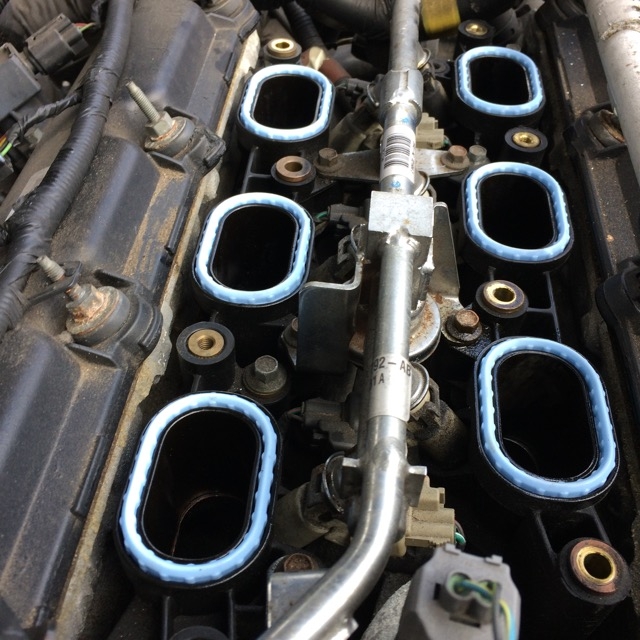
this is the top of the engine with the new oval seals now fitted , the old ones were very compressed and quite dirty , quite unlike the new ones ( £35 on the net )
IMG_3159 by MyPix on Talk Photography
i was pleasantly surprised at the overall condition of the engine components , given the miles on her, though some of the steel brackets at the front behind the rad have suffered from surface rust ,
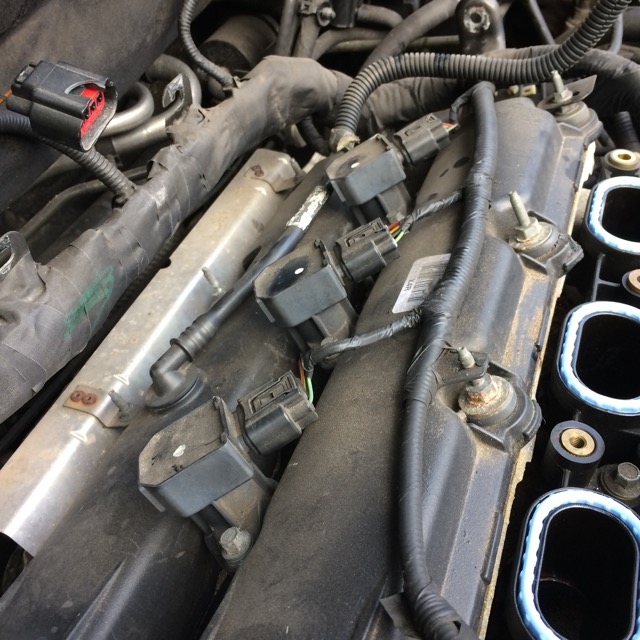
a wider view of the engine shows the rear coils which are not accessible with the inlet manifold in place, and can be neglected come service time due to the amount of work to access them

IMG_3158 by MyPix on Talk Photography
yes, i did break that plug
removing the coils is a POP , one bolt and away they lift, ensure the spring contact inside the insulator is intact and looks' good ' ,
IMG_3160 by MyPix on Talk Photography
removal of the spark plugs is as simple, especially using a correct spark plug socket and cranked handle wrench ,
the new plugs got a thin smear of copper slip , hand tightened and then a 16th turn with the socket set , pop back on the coil and again lubricate the bolt thread and gently but firmly tighten down so everything is ' square'
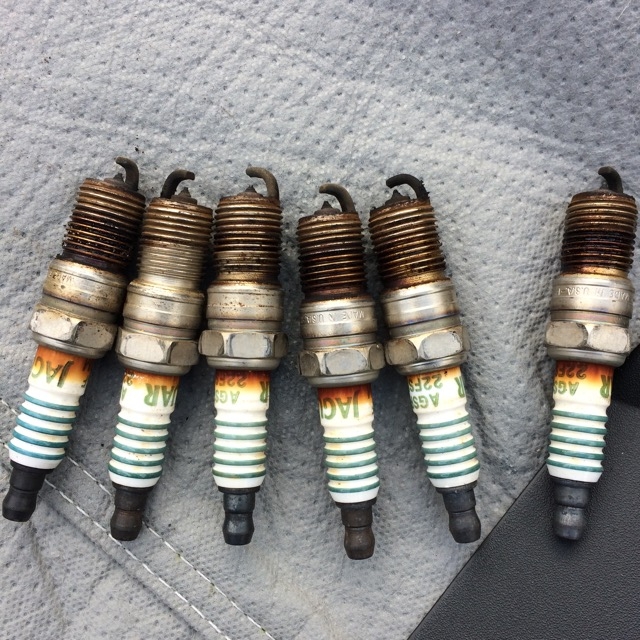
here are the old plugs, i think they have done a good job and now it was time to retire them , cylinders 1-6 left to right , gapping was all over the place on them though ( usage and possible installation ? ) with 120k miles, these should be the second set, but could easily be the originals....what do you think ?
IMG_3162 by MyPix on Talk Photography
for those wondering, the engine is numbered left to right , back right #1 , front right #2 ( from the drivers seat as ever )
i also found a severely split engine breather pipe from the top of the front cam cover to the inlet manifold behind the TB , a temporary repair will suffice for the time being as i have ordered a new one from jag, this would have been upsetting the MAF as air was entering the system after the MAF and the TB , this split was hidden under the plastic top engine cover
once everything was screwed back together she fired up first time, and runs much smoother, and the MIL light also disappeared after a few miles of driving,
i have bought another MAF sensor and will see if swapping it out will make any difference
in all about four hours of work, but well worth it knowing i have new plugs and seals installed
BB
when i eventually had a day off work i plugged in the Jaguar SSD and a few faults were thrown at me, some for the lambda sensors, and one for the MAF , the good news was that there were not any for the on plug coils etc,
but as i had the parts, and didn't know the last time they were changed as the car has now reached 120k miles on a 54 plate car i felt it was prudent to change them
after some research , the inlet manifold seemed simple to remove, in practice, this was not however the case, yes the visible parts came away quite easily , however , non of the guides mentioned the two loom support brackets under the back , and the back upright support onto the back of the block against the bulkhead, and then a tight ( very tight ) wiggle to remove the intake manifold, here she is removed from the car , mating face already cleaned
IMG_3161 by MyPix on Talk Photography
this is the top of the engine with the new oval seals now fitted , the old ones were very compressed and quite dirty , quite unlike the new ones ( £35 on the net )
IMG_3159 by MyPix on Talk Photography
i was pleasantly surprised at the overall condition of the engine components , given the miles on her, though some of the steel brackets at the front behind the rad have suffered from surface rust ,
a wider view of the engine shows the rear coils which are not accessible with the inlet manifold in place, and can be neglected come service time due to the amount of work to access them
IMG_3158 by MyPix on Talk Photography
yes, i did break that plug
removing the coils is a POP , one bolt and away they lift, ensure the spring contact inside the insulator is intact and looks' good ' ,
IMG_3160 by MyPix on Talk Photography
removal of the spark plugs is as simple, especially using a correct spark plug socket and cranked handle wrench ,
the new plugs got a thin smear of copper slip , hand tightened and then a 16th turn with the socket set , pop back on the coil and again lubricate the bolt thread and gently but firmly tighten down so everything is ' square'
here are the old plugs, i think they have done a good job and now it was time to retire them , cylinders 1-6 left to right , gapping was all over the place on them though ( usage and possible installation ? ) with 120k miles, these should be the second set, but could easily be the originals....what do you think ?
IMG_3162 by MyPix on Talk Photography
for those wondering, the engine is numbered left to right , back right #1 , front right #2 ( from the drivers seat as ever )
i also found a severely split engine breather pipe from the top of the front cam cover to the inlet manifold behind the TB , a temporary repair will suffice for the time being as i have ordered a new one from jag, this would have been upsetting the MAF as air was entering the system after the MAF and the TB , this split was hidden under the plastic top engine cover
once everything was screwed back together she fired up first time, and runs much smoother, and the MIL light also disappeared after a few miles of driving,
i have bought another MAF sensor and will see if swapping it out will make any difference
in all about four hours of work, but well worth it knowing i have new plugs and seals installed
BB
